
Ever wondered how to make classic Sloppy Joes 10× more enjoyable? The answer is simple: fresh vegetables and healthy fats.
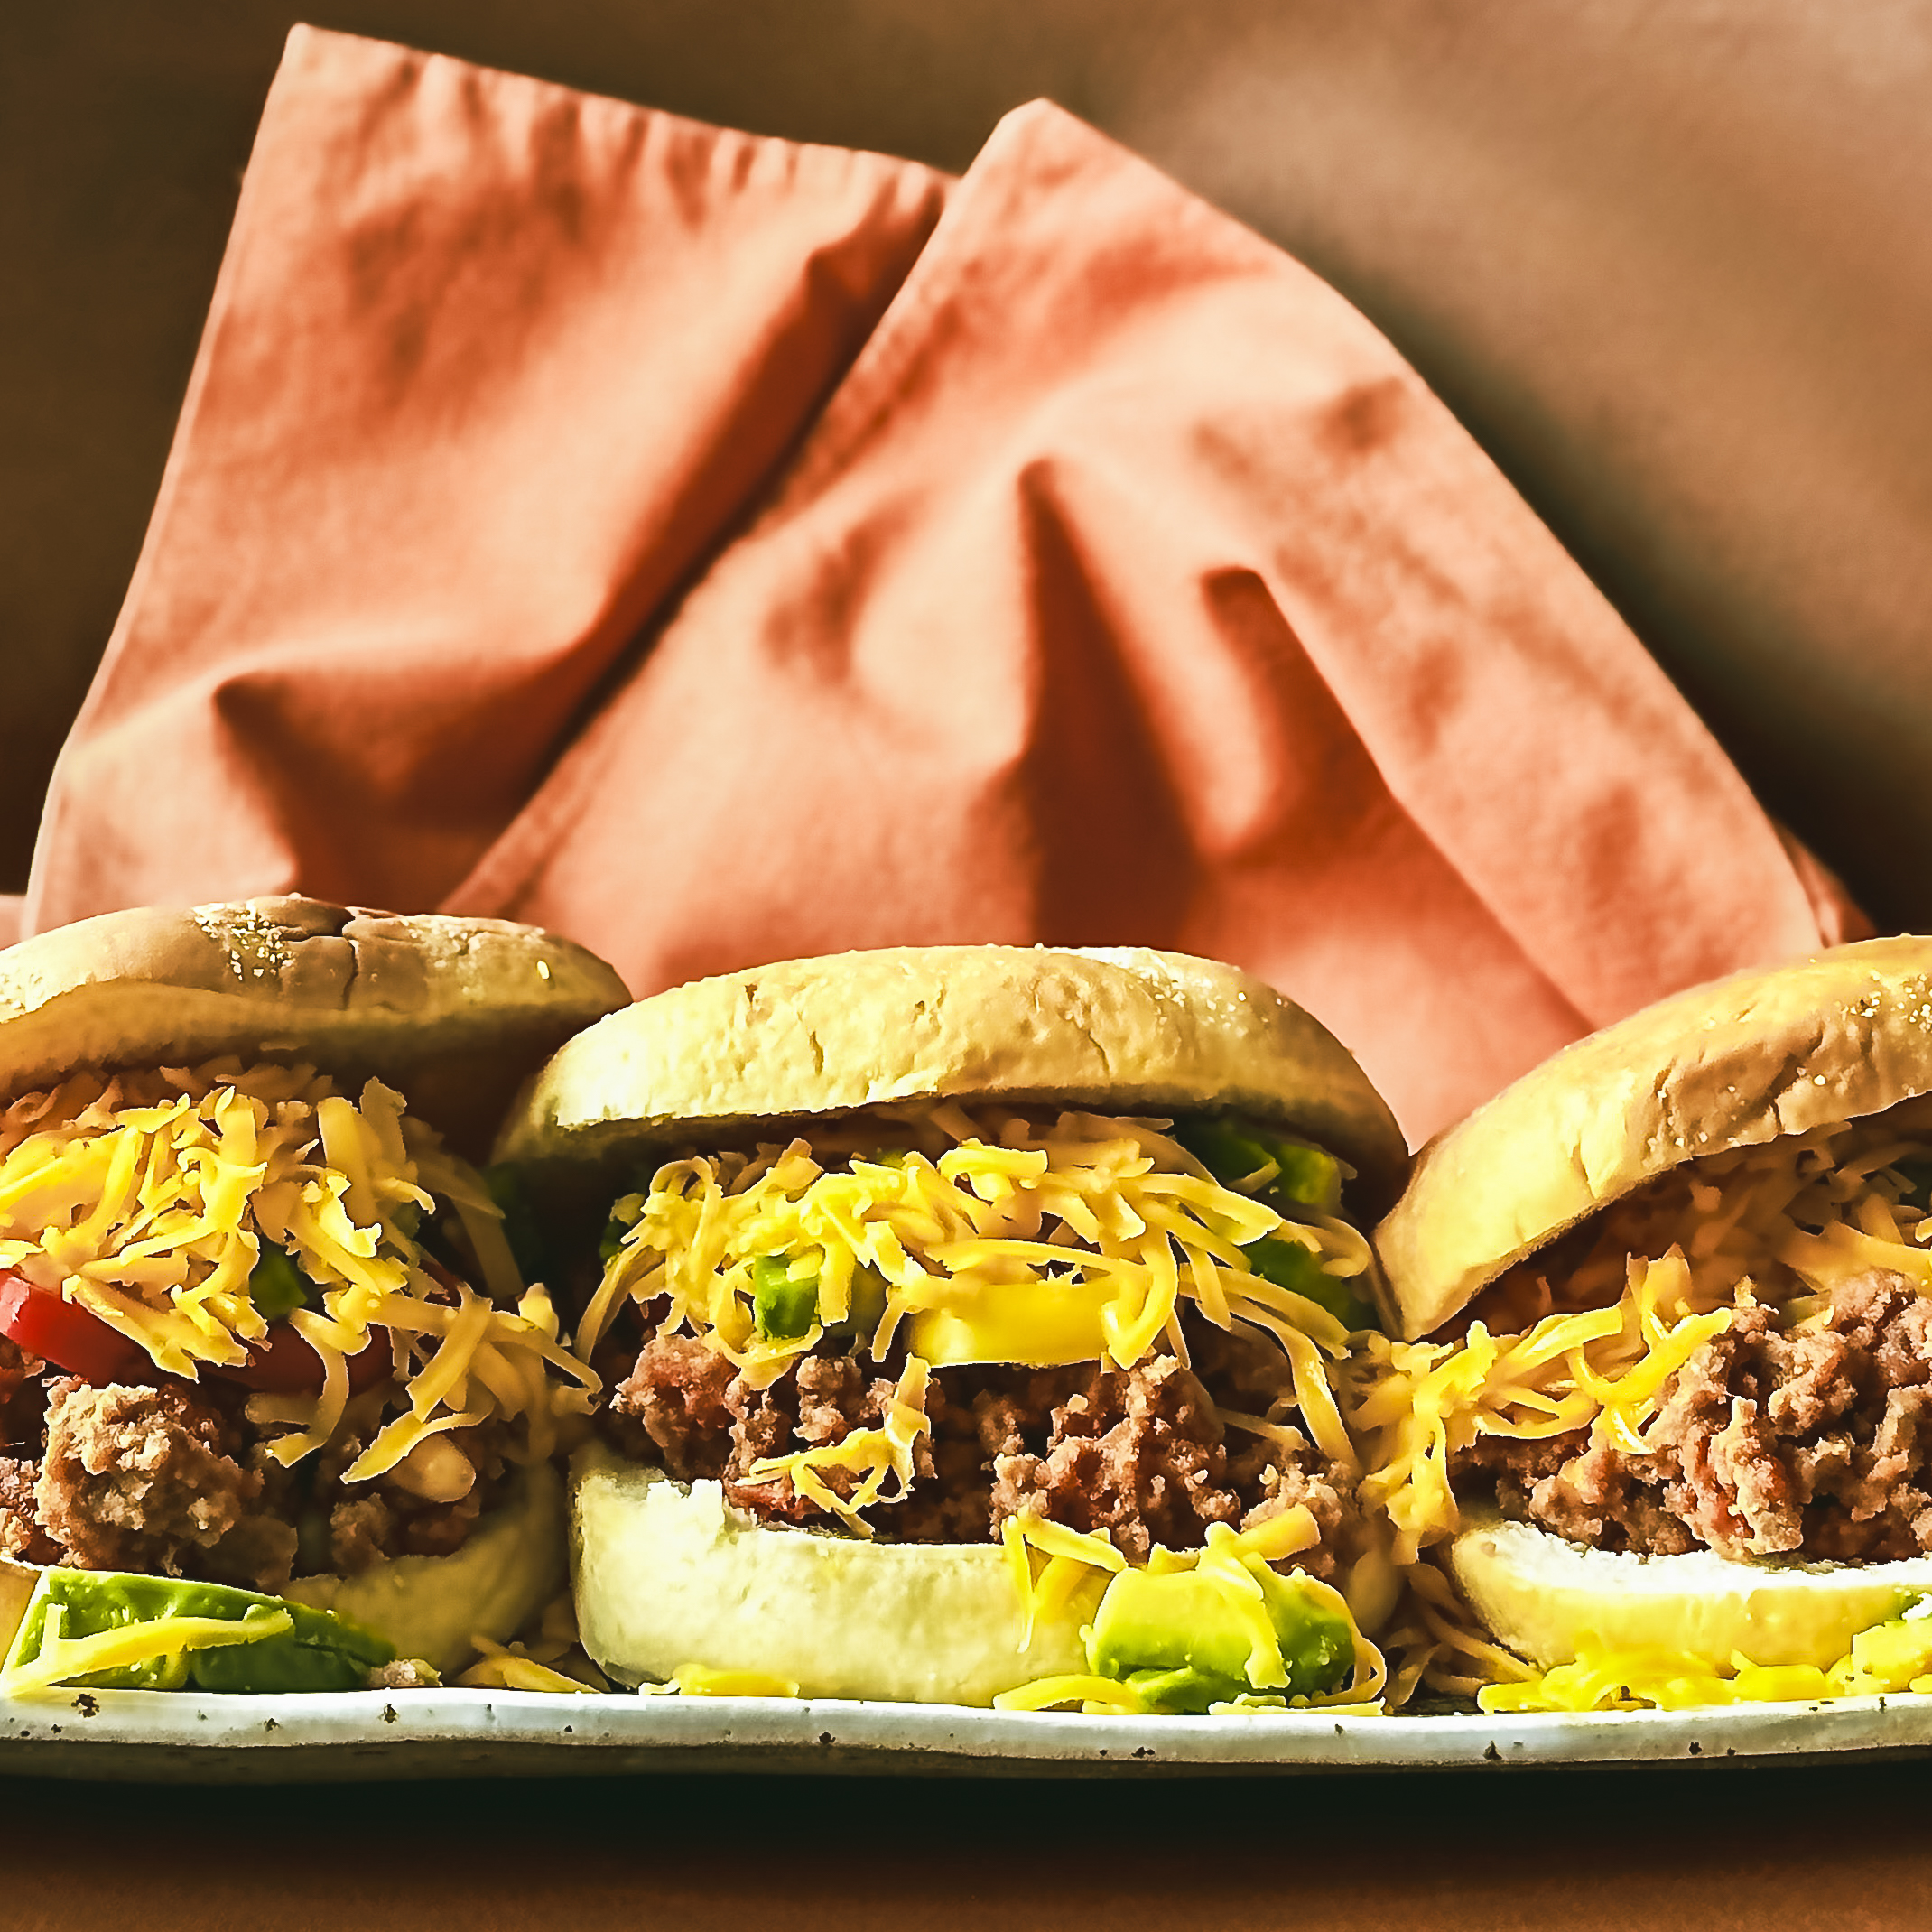
These upgraded Sloppy Joes keep everything you love about the original—savory, saucy, comforting—but add crunch, color, and balance. By folding in sweet bell peppers in multiple colors and finishing with creamy avocado, this nostalgic sandwich becomes more nutritious and, honestly, far more appetizing.
To me, Sloppy Joes deliver almost the same satisfaction as a good burger. When you look closer, they’re not all that different: seasoned meat, soft buns, and endless potential for customization. The biggest difference? Burgers usually get all the fresh toppings, while Sloppy Joes tend to stop at the meat sauce. That’s a missed opportunity—because freshness is exactly what makes this version shine.
I also shared the story behind this recipe—why I make it this way and how it became a staple in my kitchen—in my newsletter. You can read it here →
And yes, the messiness stays. That part is non-negotiable.
It’s totally allowed to eat Sloppy Joes with a fork and knife, but the real deal would be as messy as possible, meaning that you grab it with 2 hands and get a huge bite. Nevertheless, no matter how careful you try to be, some of it WILL fall out, I can guarantee this. And that’s the beauty of it.
For my family (and for me), even comfort food feels better when there’s something crunchy and fresh on the plate—or in the bun. That’s why I developed this recipe: to turn Sloppy Joes into a meal that feels indulgent and well-rounded.
To boost the nutrition even further, you can swap soft white buns for whole-wheat burger buns or hearty dark sandwich bread, or even gluten-free buns if you like! Sloppy Joes are often served with potato chips, but since this sandwich already delivers great texture and freshness, you may find you don’t miss them at all—and feel lighter after this hearty meal.
One more thing I do differently from the classic Sloppy Joes is adding canned beans in tomato sauce to the meat mixture. I genuinely believe beans and ground beef belong together—they make the sauce heartier, more flavorful, and even better the next day.
Well… let’s just say: there are a few other steps and ingredients that I do differently than in the original recipe. On the other hand, who says, what’s the very original, especially with such beloved and famous recipes!
PRO TIP:
You can make the meat sauce 2 days ahead, if properly and quickly cooled in the refrigerator. Don’t prepare the rest of the ingredients ahead, though, and definitely don’t make the Joes ready much before eating them – they will get soggy, and the veggies will lose their freshness.
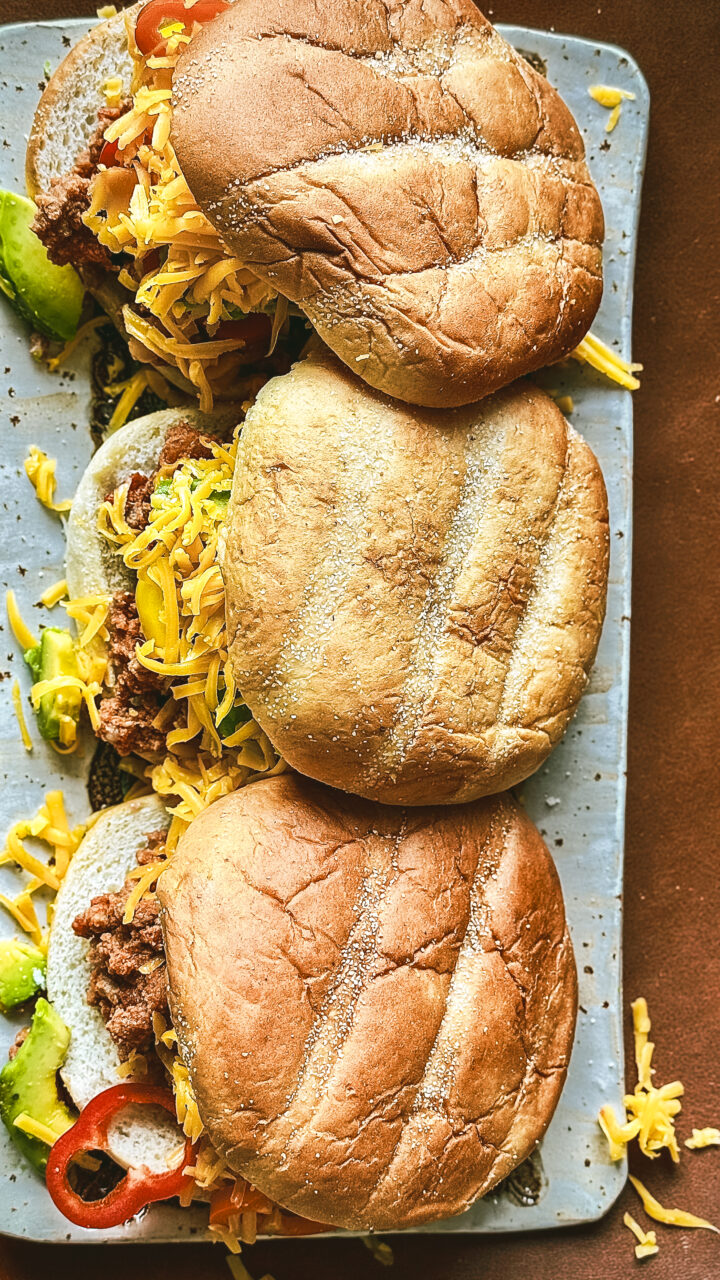
Healthier Sloppy Joes
These upgraded Sloppy Joes are hearty, comforting, and surprisingly fresh. Juicy meat sauce is paired with crunchy bell peppers, creamy avocado, and melted cheddar, turning a classic comfort food into a more modern, balanced, and satisfying meal the whole family will love.
5
servings15
minutes30
minutes756
kcal29
grams41
grams550
grams72
grams45
minutesPrevent your screen from going dark
Ingredients
2 tablespoons Neutral Cooking Oil
2 Onions, Finely Chopped
4 cloves Of Garlic, Minced
1 teaspoon Ground Smoked Paprika
0,5 teaspoon Chili Seasoning Mix Or Just A Pinch Of Chili Powder
1 tablespoon Demerara Sugar
400 g (1 Can) Chopped Tomatoes
4 drops Tabasco
1 heaped tablespoon Concentrated Tomato Paste
500 g Ground Beef
1 heaped teaspoon Fine Sea Salt (or More To Taste Afterwards)
300 g Baked Beans In Tomato Sauce
1 sweet Red Bell Pepper, De-seeded And Sliced
1 sweet Yellow Bell Pepper, De-seeded And Sliced
1 sweet Orange Bell Pepper, De-seeded And Sliced
2 ready-to-eat Avocados, Peeled And Sliced
200 g Aged Deep Yellow Cheddar, Grated
5 Large Buns Or Rolls Of Preference
Instructions
- Heat the oil in a large skillet over medium heat.
- Add the onion and cook for 3–4 minutes, until softened and translucent.
- Add garlic, smoked paprika, and chili seasoning. Cook for a few minutes.
- Sprinkle in Demerara sugar, pour in canned tomatoes, add Tabasco and tomato paste – all at once.
- Add your ground beef and start breaking the large pieces apart immediately with the spatula.
- Season with salt and mix everything thoroughly.
- Add baked beans and stir to combine.
- Cover with a lid and simmer for 20 minutes over low heat to bring out the flavors.
- Simmer for a further 10 minutes uncovered to reduce the excess liquid.
- Meanwhile, prepare your veggies and cheese, as described in the ingredient list.
- Remove the sauce from the heat. Taste and season with more salt if desired.
- Open the buns or rolls with a serrated bread knife if not opened already in the package.
- Spoon the Sloppy Joe mixture generously onto the bottom halves of the buns.
- Divide the bell pepper slices between the buns so that each Sloppy Joe gets all 3 colours.
- Divide the avocado slices as well.
- Top with bun lids, press them down slightly, and serve immediately.
Recipe Video
Notes
- The beef sauce can be frozen for 3 months in a freezer-friendly plastic container. Don’t freeze the whole prepared sandwiches or fresh ingredients.
- Have forks or spoons available when serving the Sloppy Joes, because who would like to leave all the goodness on their plates that happens to fall out (and it will).
- Don’t prepare the veggies in the very beginning, and don’t grate the cheese. You’ve got plenty of time to deal with them while the sauce is bubbling on the stove. They should be as fresh as possible when served.
- Texture matters: For the best eating experience, assemble the Sloppy Joes just before serving. Letting them sit too long will soften the buns and dull the freshness of any added vegetables.
Let me know if you made the recipe!
Tag @helenalauralesment on Instagram and hashtag it with #healthycomfortfood
Pin this recipe!
Follow @helenalauralesment on Pinterest
Share the recipe on FB!
Follow Helena-Laura on Facebook


